

A huge part of your job in Quarantine Zone: The Last Check is separating healthy survivors from zombies-to-be. Get this wrong and you could wind up with an infection outbreak in your camp, majorly jeopardizing your shot at hitting your evacuation quotas.
Even when faced with an obviously infected survivor, you shouldn’t send them to Liquidation without completing a full inspection. To score the maximum amount of Respect Points, make sure that you tag all symptoms found on a survivor—even totally harmless ones like freckles or bruises.
At first, you won’t have a full list of symptoms to choose from, or the tools needed to identify them. Each day you'll have to have more red flags to learn and instruments to keep track of, until eventually you're doing a lot of mental juggling in each interaction.To help save your camp from a bloody, brain-munching fate, here’s a full rundown of all the Quarantine Zone tools and how they’re used to identify symptoms.
Thermopulsometer | Heart rate, temperature |
Reflex hammer | Limb reactions |
Stethoscope | Wheezing, growling |
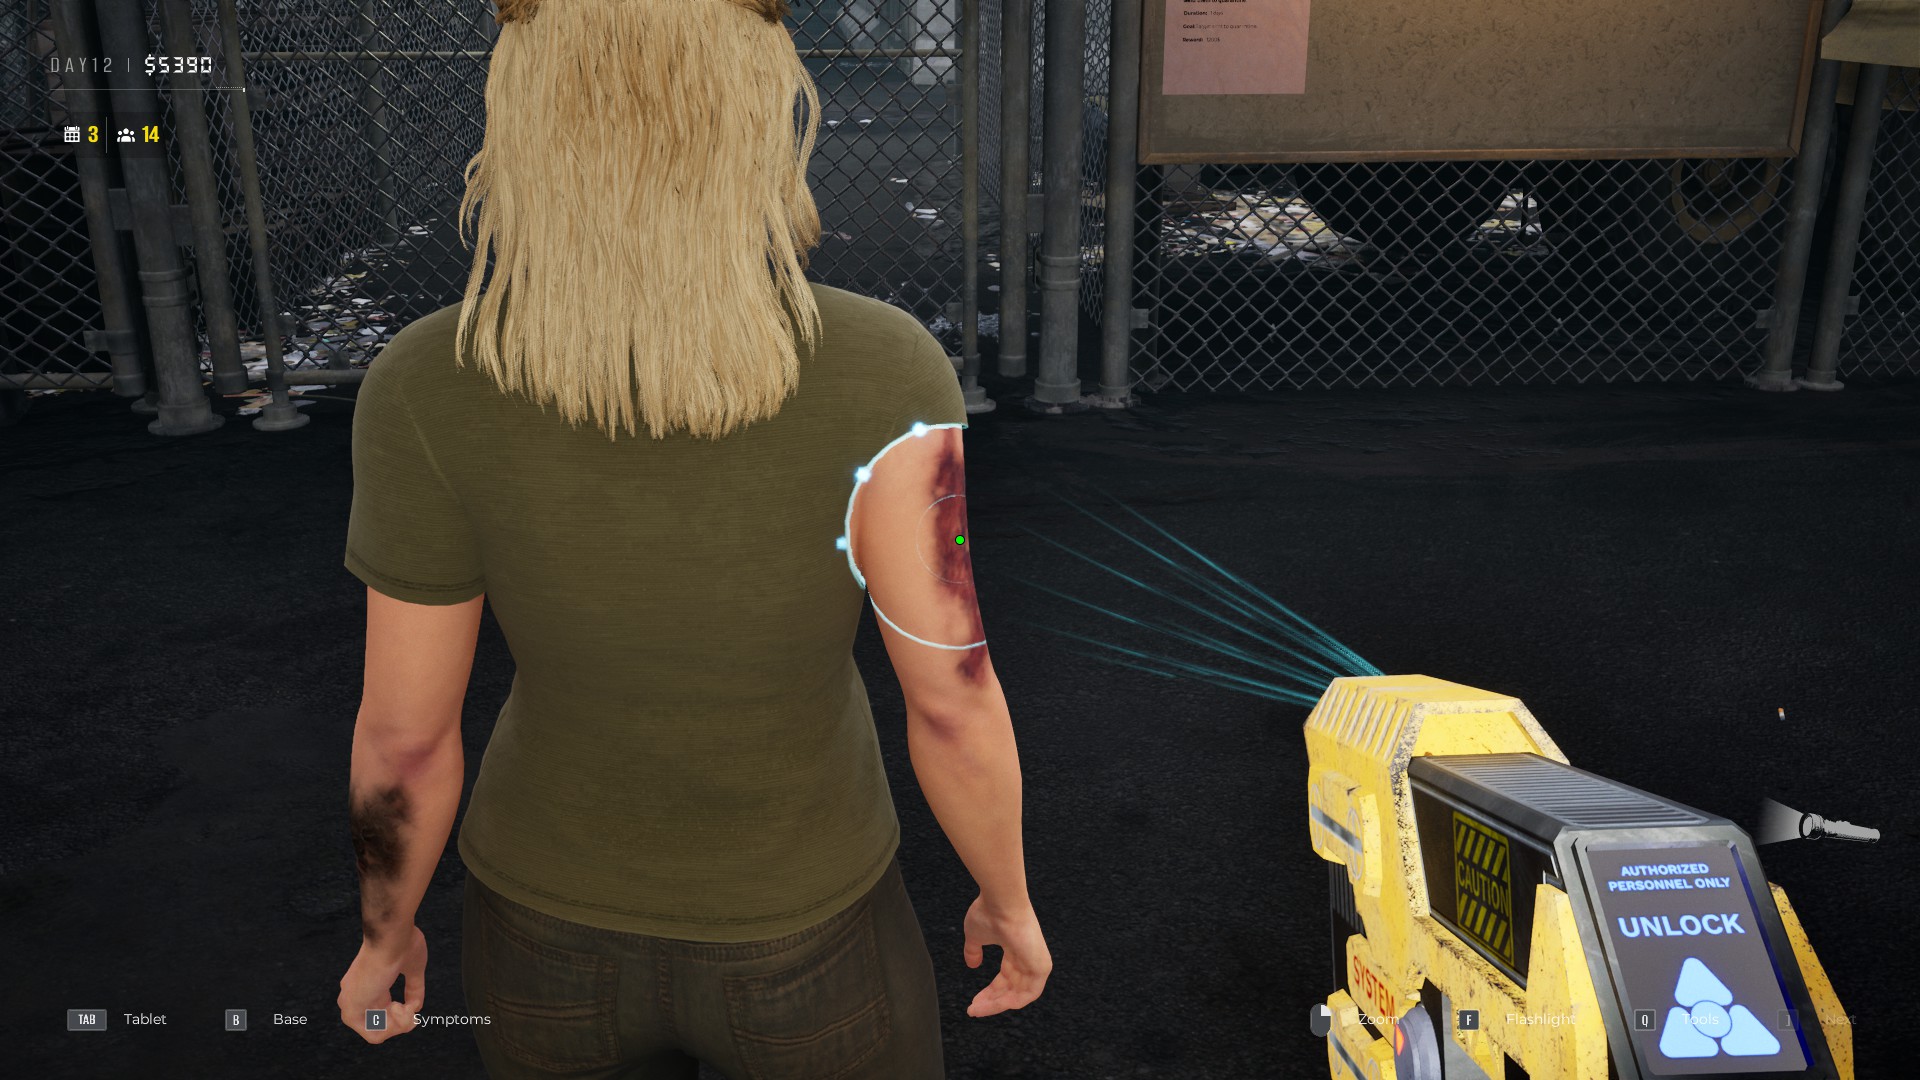
Scanner | Bruises, bites, necrosis, rashes, cuts |
X-ray | Internal bleeding, mold, foreign objects |
Matioscope | Eye bacteria, parasites |
UV light | Body or belongings infection signs |
Scanner
Yellow eyes | Conjunctivitis | Red eyes |
Freckles | Skin rash | Green skin (can appear yellow depending on skin tone) |
Herpes | Pale skin | Bite mark |
Red skin | Red bruise | Necrosis |
Bruises | Skin cuts | Eye Pus |
Nose bleed | Mouth bleeding | Nose pus |
Agression |
Use the scanner to see through survivors’ clothes and find any marks on their skin. Make sure to view their body from all angles and crouch down to check their feet too.
Your flashlight comes in handy for this part of the inspection process, as some symptoms can be hard to identify in lowlight. For example, red bruises and necrosis look pretty similar at times. They’re both splotchy patches that are significantly darker than bruises, but red bruises are a more deep, purple tone while necrosis is a cool black (with small sections of blood red).
Thermopulsometer
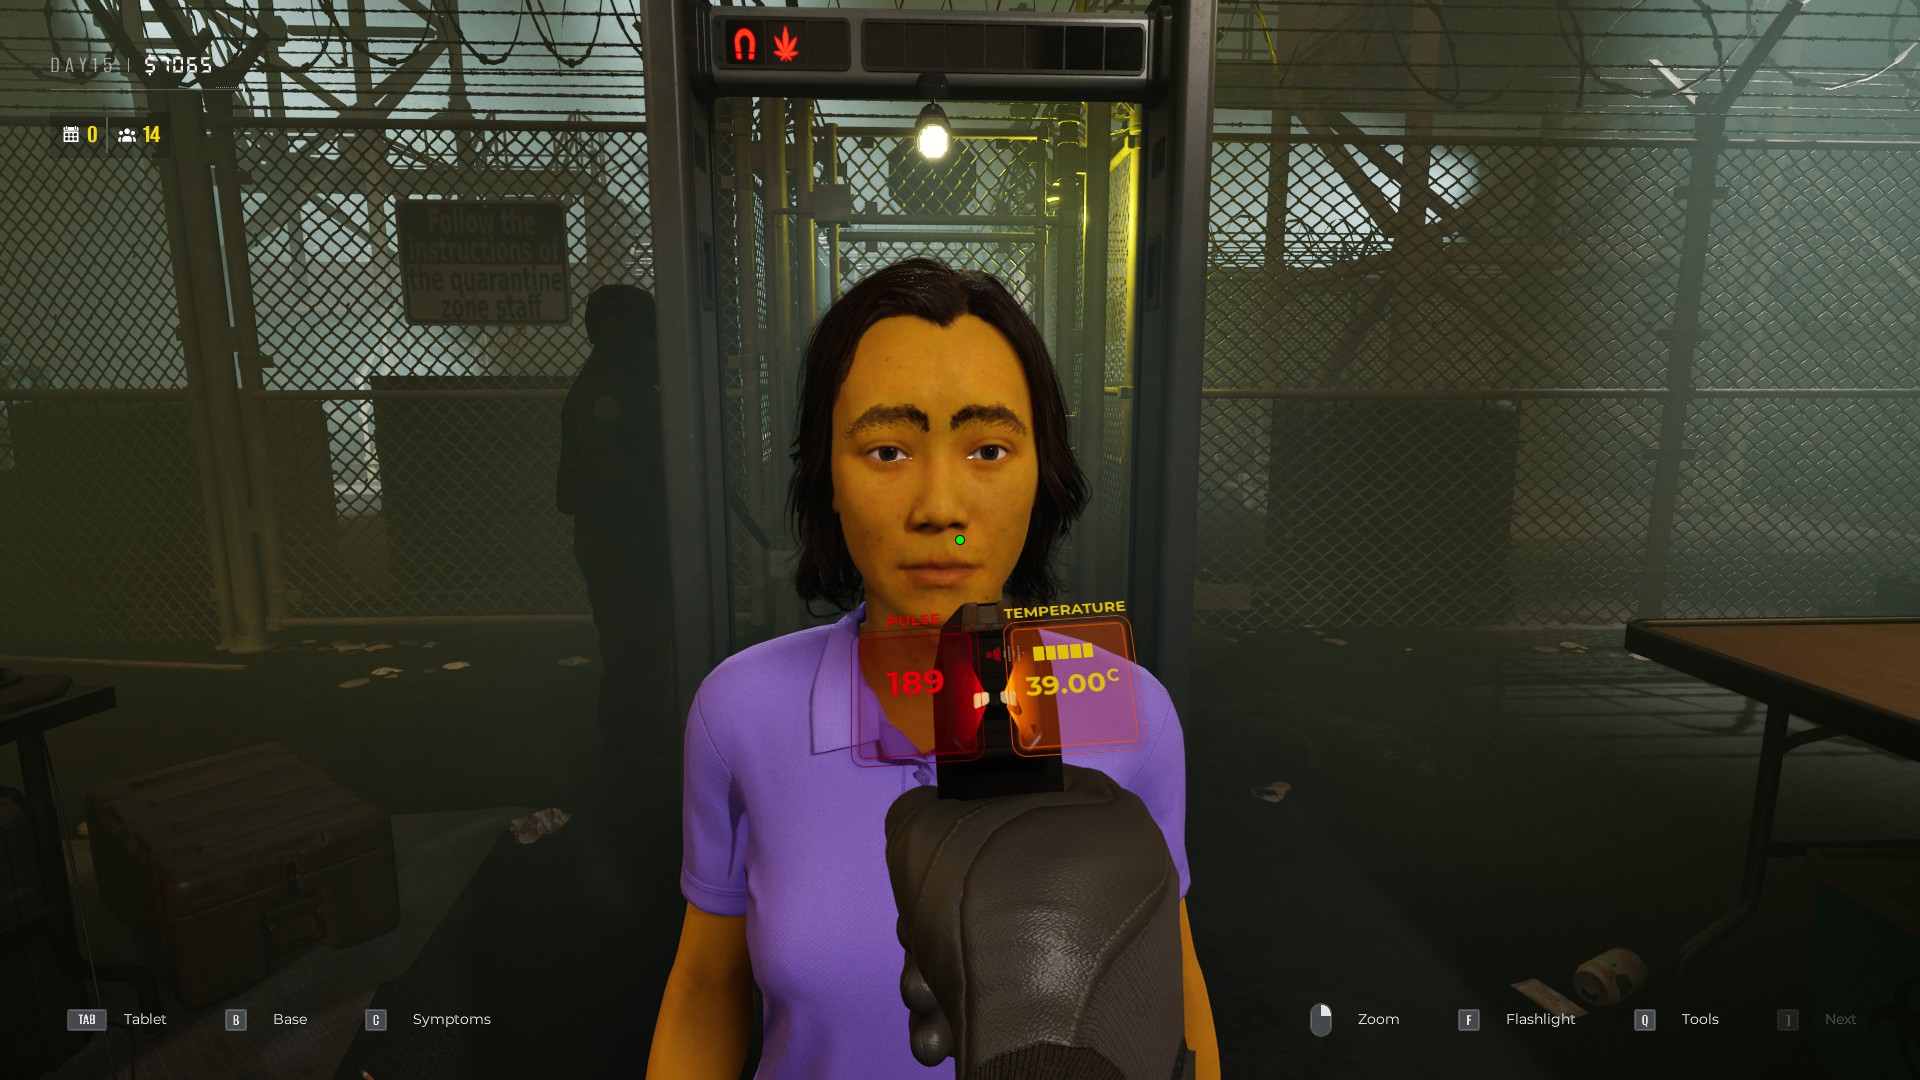
Temperature below 37° C | Temperature 37° C - 41° C | Temperature 41° C - 45° C |
BPM below 120 | BPM 120-180 | BPM 180-200 |
Use the thermopulsometer to check the heart rate and body temperature of a survivor. Make note of both of these figures and compare them with the ranges listed in your symptoms list. If you’re having trouble remembering these ranges, upgrade your thermopulsometer to provide color indicators or sound cues.
Reflex hammer
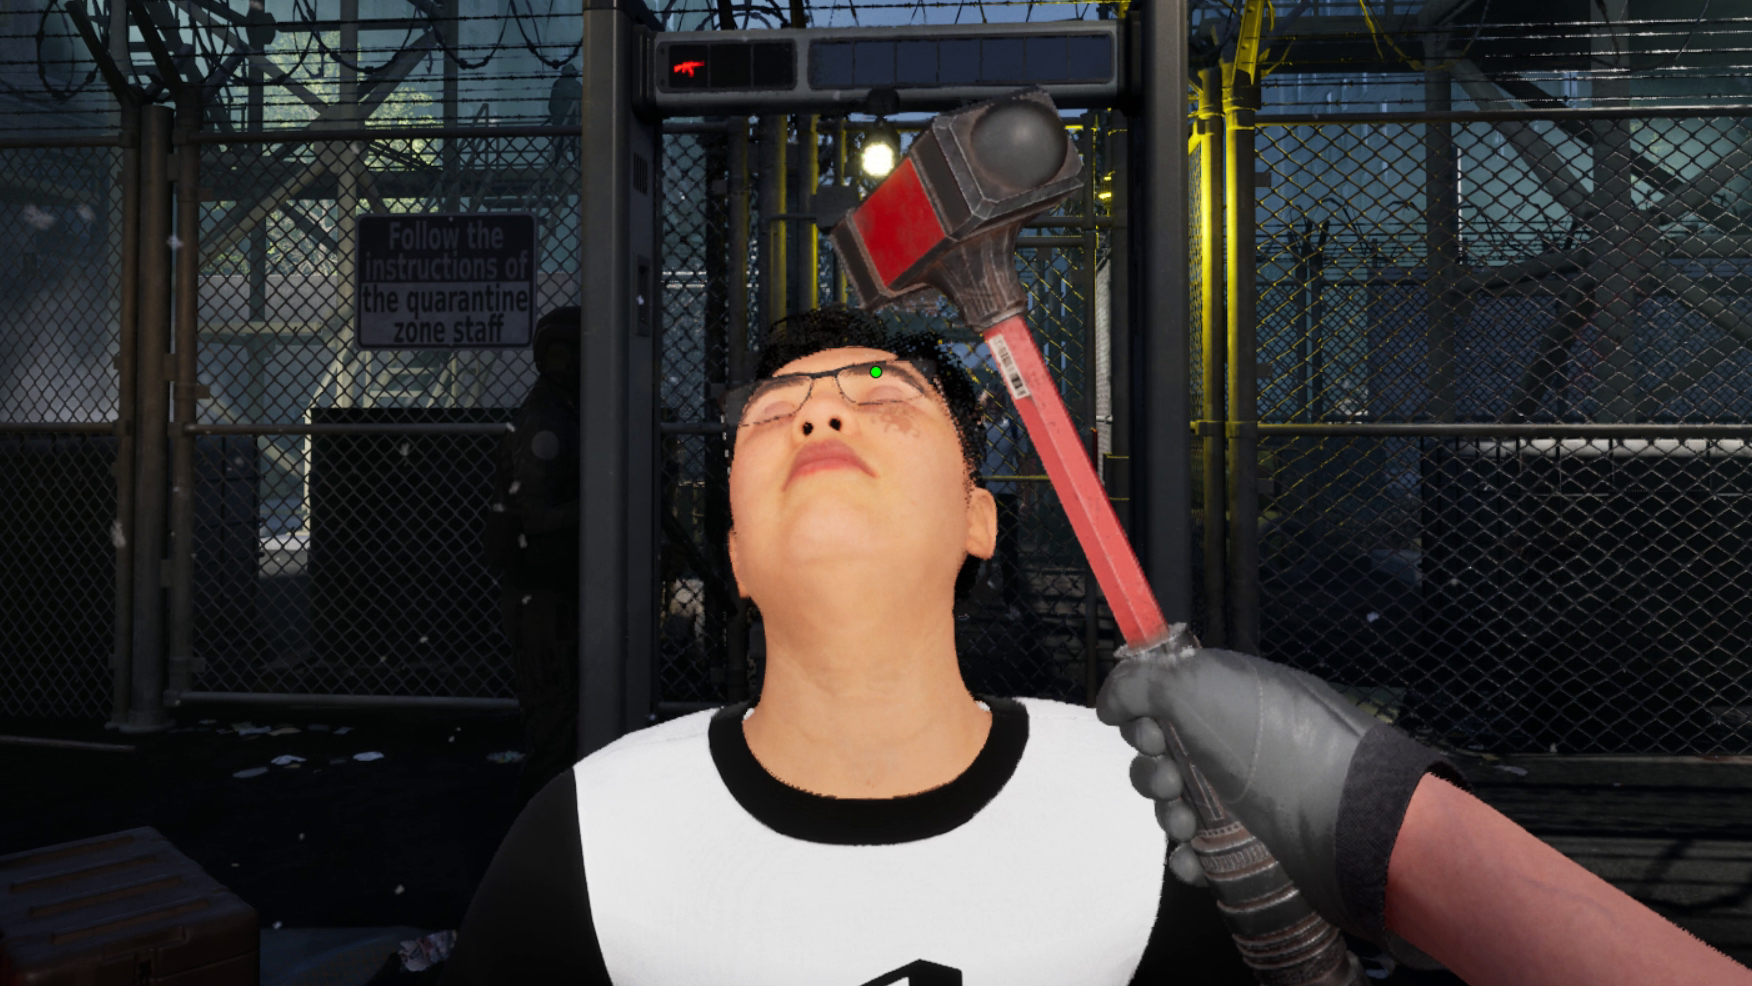
Normal reflex | Hyperaggressive reflex | Crossed reflex (opposite limb responds) |
Absent reflex |
Testing a survivor with the reflex hammer is probably the most straight-forward part of an inspection. Simply hit them in either the arm or the leg, and wait to see how they respond. If a survivor is healthy, the limb you hit will swing backwards.
Stethoscope
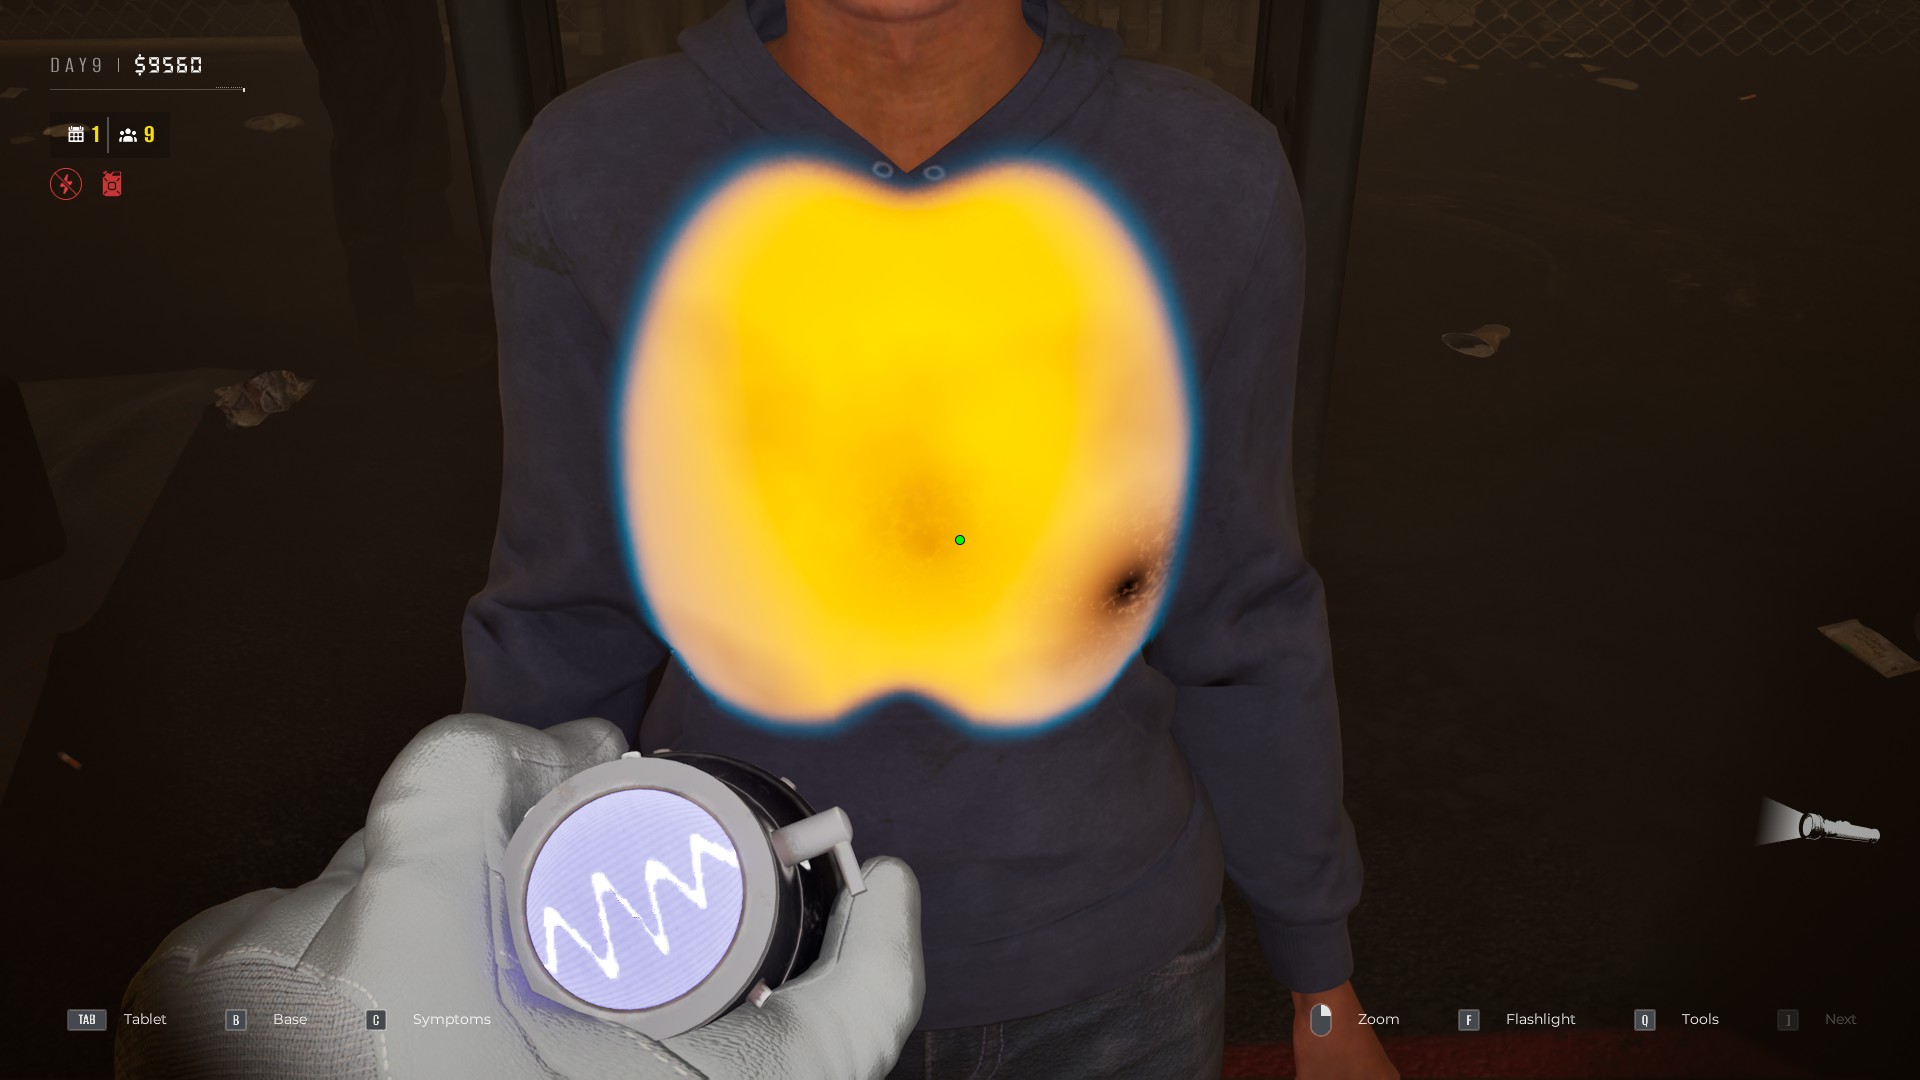
Normal breath | Nonspecific respiration | Infected breath |
Sickly breath |
Use the stethoscope tool to check out the health of a survivor’s lungs. Place the tool on the survivor’s chest and hover over any black spots you can see. These could be on the front of the lungs or the back, so be sure to check both sides.
Pay attention to how the sound of the survivor’s breath changes when you hover over each black spot. A wheezing breath indicates they are sick, but are still safe to go on to the survivor’s block. A wheezing inhale with a silent exhale (sometimes paired with a clicking sound) means the survivor should be sent to quarantine. If you hear a growling noise from the lungs, they’re definitely infected.
Not all of these respiratory symptoms will be in your symptom list to start with. So, if you hear a breathing sound you don’t recognise, send the survivor to the laboratory for testing.
X-ray

Standard organ appearance | Color differences | Organ necrosis |
Fatty hepatosis | Mould | |
Internal bleeding |
When it comes to x-rays, pay particular attention to any survivor who’s hunched over and holding their stomach. While it’s not guaranteed, these survivors are more likely to show abnormalities in their organs like internal bleeding, cuts, or unnatural colors. Switch between all four views to get the best visibility.You can also use the x-ray to check whether survivors have gotten …creative with smuggling contraband.
Matioscope
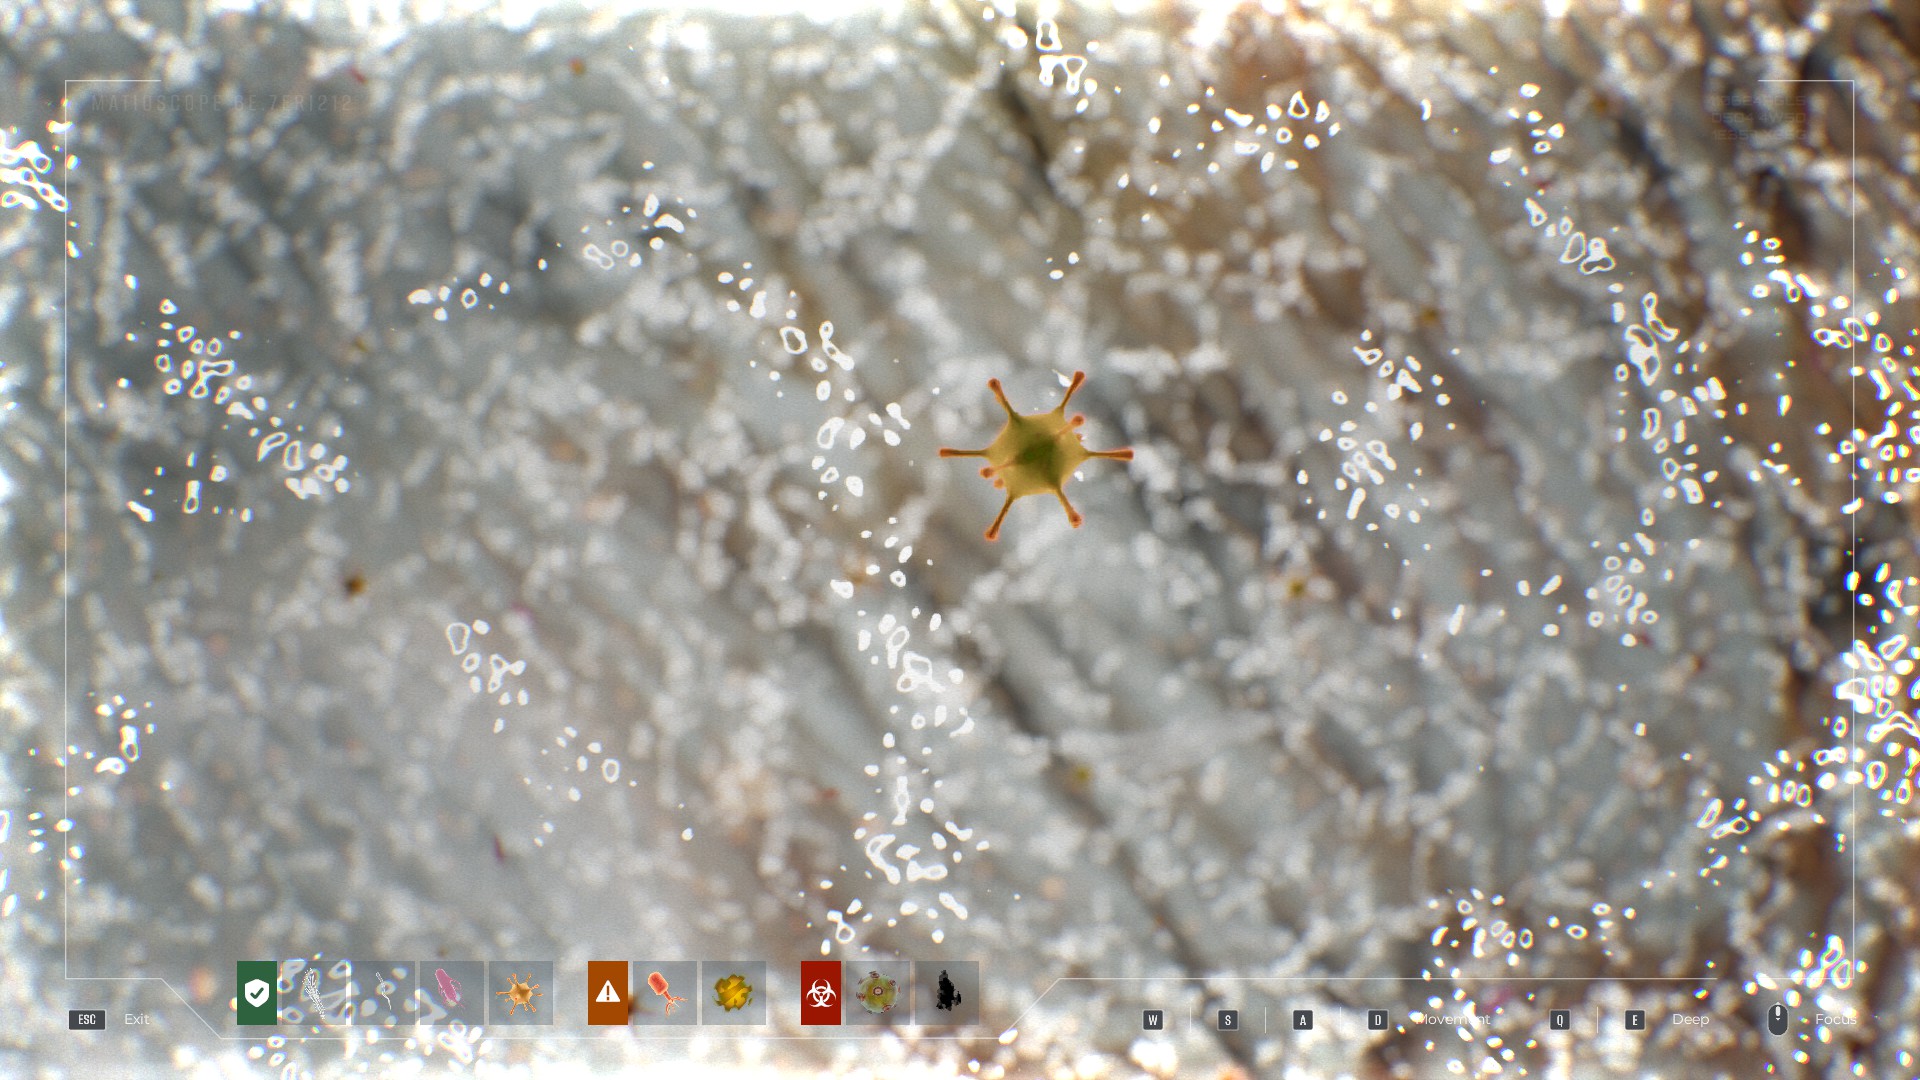
Ocular spicular bacterium | Phage complex | Necrotic plume |
Thread cluster | Chromatic Staphylococcus | Corneal infiltrate |
Ocular helminth | ||
Adenoviral body |
The matioscope tool reveals parasites and bacteria in the eyes by zooming in on a microscopic level. While it sounds very sci-fi, it’s fairly straightforward to use. Just pan around on each layer until you find an anomaly, and then adjust your focus to identify it.
Baggage and UV
Normal baggage | Contaminated baggage |
Contraband (confiscate to receive cash bonus) |
UV vapour | UV symptom |
UV contraband |
Once unlocked, activate the UV light using a button on the luggage table. Once turned on, the UV light reveals glowing signs of infection on the survivor and their belongings.


 Bengali (Bangladesh) ·
  English (United States) ·